Purple Deadnettle – Harvest, Dry, Medicinal, Edible

Purple Deadnettle, Lamium purpureum (LAMIACEAE), is an early spring wild plant that can be foraged for its medicinal and edible properties. Some variations of the plant name include “Purple Deadnettle”, “Purple Dead Nettle”, “Purple Deadhead Nettle”, and “Purple Archangel”.

Forage Purple Deadnettle

Purple Deadnettle is most prominent in early spring, but it is often seen growing in late winter through summer.  It grows in most US states.  It can even be found growing through a soft layer of snow, similar to daffodils and crocus. It is commonly found in lawns and edges of gardens, fields, and roadsides. Many people spend great effort trying to remove them from their pristine lawns and flower beds and do not appreciate its true worth!  We do not have a lawn of just grass.  We gladly have this beauty and many others in our lawn.

Dense Patch of Purple Dead Nettle Plants

Identify Purple Deadnettle

Purple Deadnettle is a member of the mint family which means it can spread rapidly and be considered invasive.  It has no discernable smell although it is in the mint family. It just smells grassy. Mature plants can grow as tall as 8 inches. It is commonly found in shorter stubby heights especially in lawns and areas that are regularly mowed or cultivated.

Purple Deadnettle Leaves

The leaves of Purple Deadnettle are green at the bottom and gradually transition to purple towards the top. This purple leaf top is presumably why some have called it the Purple Deadhead Nettle. The leaves are slightly jagged and basically heart-shaped coming to a pointy and are up to 1.5 inches long.  Leaves typically slant at a more downward angle from the stem. The leaves and stalk have hairs but do not sting like the “Stinging Nettle” variety. The term “dead” nettle refers to nettle varieties where the hairs on the leaves and stems do not sting. Leaves grow in pairs opposite each other along the stem.

Purple Deadnettle Flowers

Flowers grow in a small cluster of funnel-shaped, purple blooms about .5 inches long.

Purple Dead Nettle Live Plant

Look-alikes

Henbit Deadnettle, Lamium amplexicaule (LAMIACEAE), is the only close look-alike.  Henbit’s flowers are a little longer and more slender than those of Purple Deadnettle and Henbit’s leaves are green all the way to the apex and are not heart-shaped.  They are both varieties of “dead” nettle and have similar properties.  Henbit is edible and medicinal as well so do not fret if you confuse the two.

Harvest Purple Deadnettle

Cut the plant stem just above the ground to harvest. Give each plant a good upside down shake for dust and ants. Ants love Purple Deadnettle. Plants can be lightly rinsed with cool tap water, but do not over drench or soak. Inspect them again for those pesky ants!

Edible Parts

Leaves, Stems, and Flowers

Medicinal Properties

Although Purple Deadnettle is not as effective for allergies as Stinging Nettle, it does still aid in seasonal allergies. It also has anti-inflammatory and anti-microbial properties.

Edible and Medicinal Preparation

Fresh leaves and flowers can be used raw. Stems can also be eaten raw, but they are not as tender and in my opinion are better used after drying. All parts except the root can be used in salads, steeped in teas, cooked in soups, casseroles, and even smoothies.

Drying Purple Deadnettle

  1. If using fresh I would prefer individual leaves and flowers removed by hand or with a knife, but for drying I simply pop off the top “head” all in one piece.
  2. Remove any straggling leaves from the stem.
  3. I only use the top portion of the stem and discard the lower tougher stem.

Dehydrator

  1. Spread heads and leaves as flat as possible on dehydrator sheet.
  2. Dehydrate on low for 6-8 hours.

Oven

  1. Spread heads and leaves as flat as possible on an ungreased cookie sheet.
  2. Bake on low (175 degrees F or less if possible) for 8-10 hours.

Air Dry

I prefer to air dry most herbs that are more delicate like this. It does take longer and can be cumbersome if you do not have the space.  However, it is worth it if you can accommodate.

  1. Spread heads and leaves as flat as possible on an herb drying rack or on a flat basket so that air can circulate.  You can also use a dehydrator sheet without the dehydrator.

    Tops of Fresh Purple Dead Nettle Plants Prepared for Drying
    Tops of Fresh Purple Dead Nettle Plants Prepared for Drying
  2. Gently stir around with hand about once a day the first day or so especially if you rinsed with water.
  3. Check in 4-5 days.  If not complete dry and crumbling, check daily for until completely dry.

    Tops of Fresh Purple Deadnettle Plants Air Dried for 5 Days
    Tops of Fresh Purple Dead Nettle Plants Air Dried for 5 Days
  4. It generally takes 5-8 days to air dry completely for storage.
    Tops of Fresh Purple Dead Nettle Plants Completely Air Dried for 8 Days Ready for Storage
    Tops of Fresh Purple Dead Nettle Plants Completely Air Dried for 8 Days Ready for Storage

    Tops of Fresh Purple Deadnettle Plants Completely Air Dried for 8 Days Ready for Storage
    Tops of Fresh Purple Dead Nettle Plants Completely Air Dried for 8 Days Ready for Storage

Storage

Purple Deadnettle can be stored for long-term use after it has completely dried.  It should be stored in a glass jar with a proper air tight lid.  I use a myriad of size, shapes, and styled jars for storing dried herbs.  In this example, I repurposed a Starbuck’s Mocha Frappuccino iced coffee bottle.  This is one of my little guilty pleasures from time to time.  These bottles are pretty great to reuse. They are glass. The lid has a rubber or silicone seal and the labels on the jars remove pretty easily.  The only drawback is the lid has Starbuck’s on it. I used to use a sharpie and tape to label my jars, but it doesn’t look as “cute” or “tidy”.  I splurged this year and got this compact label maker.  It has already paid for itself.  I label the side of the jar and cover up part of the Starbuck’s verbiage on the lid.

Dried Purple Dead Nettle in Starbuck's Bottle
Dried Purple Dead Nettle in Starbuck’s Bottle

Green Beans and Sweet Bell Peppers in the New Garden

We had the delusion that we could get a good size garden planted this year even with the move. We thought the first year we would have a smaller one than the garden we had at the old place, and then by next year we would have double! But with all of the moving, projects at the new house, and keeping the old house up so it can sell…it didn’t seem like any garden was going to happen at all. This was just unacceptable because our stored canned goods are running quite low and we just wanted our garden! So although it was later than planned and thrown together Jon just got out there in the side backyard and just tilled up one row for some green beans and a couple of sweet red bell pepper plants a couple of weeks ago.
Continue reading “Green Beans and Sweet Bell Peppers in the New Garden”

Mint to Repel Insects and Rodents Around the Chicken Coop

Mint is one of my favorite scents and plants. It has such a crisp, clean, fresh aroma. We have a nice mint patch growing at our old house. Mint self propagates rapidly. This is a blessing as it is so easy to grow. However, you do want to give considerable thought to where you plant mint as it will spread and could become a nuisance if planted in the wrong location. Two months ago I dug up several of our spearmint and orange mint plants at the old house and put them in temporary pots. Those mint plants set for two months before I finally got around to transplanting them at our new home.

Continue reading “Mint to Repel Insects and Rodents Around the Chicken Coop”

Establishing a New Herb Garden

Since moving to our new home we have been working hard to get our plants established. We were quite blessed at our last home and had accomplished a lot. So in some ways it depressed me to have to start over. However, we learned a lot during that time. We learned a lot about what works and what doesn’t. We are able to apply what we have learned as we establish our plants at our new home. Our herb garden must be near the kitchen and easily accessible. We decided to start our herb garden around the well house which is to the side of the house close to the back door at the kitchen.

Continue reading “Establishing a New Herb Garden”

Overcome the Challenges of Growing Peaches

Few fruit say summer quite like a tree-ripe peach, dripping juice down your chin and hands all the way to your elbows. Although you are unlikely to find this perfect peach at the grocery store – peaches do not continue to ripen more once picked — you can enjoy this treat if you grow your own. Growing top quality peaches is not without its challenges. If you are prepared, however, you can conquer them with a little bit of knowledge and regular attention.

How to Grow Peach Trees by Stella Otto

Continue reading “Overcome the Challenges of Growing Peaches”

Reliance Peach Tree Production Two Years After Planting

In March of 2013 we planted five fruit trees at the house. Of those trees two were semi-dwarf peach trees, one was a majestic peach and the other a reliance peach. The first year we planted them they both had tons of little baby peaches, but we had to force ourselves to thin them down to just a few. That year we got one cute little peach that the bugs decided to share with us. Then last year we had lots of blossoms and we still thinned them, but the bugs and fungus were horrible and we got nothing.

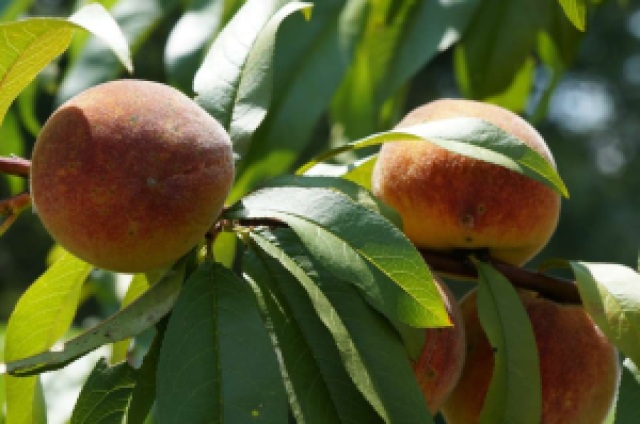
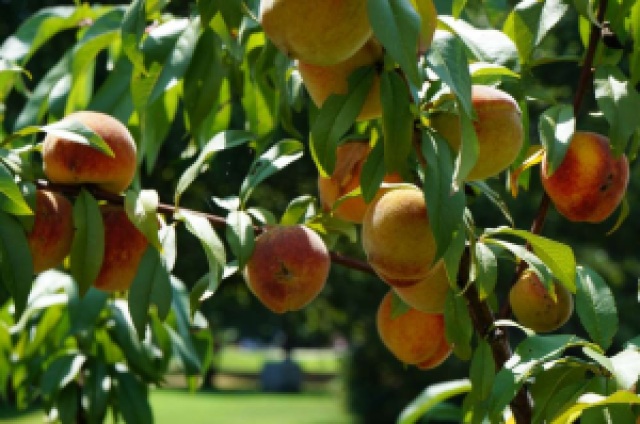
This year we had a late frost. We tried covering our fruit trees with sheets, but they are about to get too big to effectively do that. Our majestic peach tree blooms early and did not fair too well because of the frost. However, the reliance peach tree blooms later and is a beautiful sight this year. Just look at all of those peaches!

First Production of Young Semi-Dwarf Reliance Peach Tree
First Real Production of Our Young Semi-Dwarf Reliance Peach Tree

Continue reading “Reliance Peach Tree Production Two Years After Planting”

Growing Raspberries Year 2

How wonderful it is to see everything coming alive in the spring. Last year in February we planted 4 bare root raspberry canes. Along the trellis you can see how much our 4 raspberry canes have grown.

Continue reading “Growing Raspberries Year 2”

Food, Inc Documentary

Yesterday evening Jon and I watched the Food, Inc documentary on Netflix.

Food, Inc. Documentary

We were already aware of much of the horror unveiled in the film, yet still were shocked at times. This kind of thing is one of the major reasons we started growing our own food. We still have a long way to go before we are self-sufficient, but we do sleep better at night knowing that we are doing something.

View the Food, Inc Documentary Trailer

http://video.pbs.org/viralplayer/1402965302

Synopsis from PBS

In Food, Inc., filmmaker Robert Kenner lifts the veil on our nation’s food industry, exposing the highly mechanized underbelly that’s been hidden from the American consumer with the consent of our government’s regulatory agencies, USDA and FDA. Our nation’s food supply is now controlled by a handful of corporations that often put profit ahead of consumer health, the livelihood of the American farmer, the safety of workers and our own environment. We have bigger-breasted chickens, the perfect pork chop, insecticide-resistant soybean seeds, even tomatoes that won’t go bad, but we also have new strains of E. coli — the harmful bacteria that causes illness for an estimated 73,000 Americans annually. We are riddled with widespread obesity, particularly among children, and an epidemic level of diabetes among adults.

Continue reading “Food, Inc Documentary”

Seeds of the Month Club

Are you as tired of winter as we are? Jon and I are both so ready for spring. We are as tired of the snow and ice as the chickens are. Although I understand the importance of winter and that every season has it’s place, I am just not a fan. We have done our winter chores, planned our garden, and ordered our seeds. And still we wait during another snow and wintry mix. Sigh.

Last year, I thought long and hard about joining The Seeds of the Month Club, but did not. I just do not join things on a whim. The more I pondered it the more, I wanted to join. When you look at the price per seed packet for these Non-GMO heirloom seeds it really is a great deal.

Continue reading “Seeds of the Month Club”

Tips for Planting Apple Trees

After our visit to Century Farm Orchards, we went up to the land to plant and cage as many of our apple trees as we could before dark. Right now, we are planting a single row of apple trees along the long road that is the entrance to our land. As soon as we can get a patch of land cleared off (this has not gone as expected), we intend to plant our full orchard (3-5 trees at a time). The orchard will mostly consist of apple trees, but we also plan on peach, plum, and a couple of nut trees. We have already planted 5 trees at the house and 5 trees at the land. But still we are learning so much.

Preparing the Soil

Apple trees like a neutral pH (meaning 7). Around here our soil is naturally acidic and a hard clay. Be sure to test and know your soil to determine if you will need to amend. For us, this means we will need to add lime to raise our pH. Most lime available in garden centers is dolomitic lime. Dolomitic lime also contains magnesium. Over time an overabundance of magnesium can block the absorption of calcium. However, our NC clay is so nutrient deficient it may take a decade or more for that to occur. So for planting we will use a granular dolomitic lime. When digging the hole, put all of the dirt into a wheel barrow rather than on the ground next to the hole. Once the hole is dug, mix in the soil amendments (for us 2 to 3 Lbs of  dolomitic lime) into the soil (clay) in the wheel barrow with a trowel or shovel. When we planted our first trees at the house I was concerned that we had done them an injustice by using the clay from the hole we dug. I thought it would be better for the trees to use a bought better quality soil, but we were too cheap to do that. However, what we learned from Anne Stomp on our visit to Century Farm Orchards is that it is best to use the native soil from the dug hole. A tree’s roots will become trained to the soil that it is planted in. If store bought soil is used to fill the hole, once the roots grow and reach the outer edge of the hole they will stop extending and begin to grow around as though it was potted because it does not recognize the soil.  This circular growth of the roots will be a problem as the tree matures because the roots will not provide a proper strong foundation for the tree. A shallow root system may cause the tree to be damaged or completely uprooted in a storm. Also, if the roots are not extending out to reach available nutrients and water beyond the base of the tree, it may become under nourished over time. It is therefore best for the tree to become accustomed to the native soil from the time of planting so that it will continue to extend its roots further developing a strong root system. I was relieved to know that we inadvertently did the right thing when planting our first trees.
Continue reading “Tips for Planting Apple Trees”