With all of the leaves now fallen away from our fruit trees we needed to paint the tree trunks white. We did this for those that were already planted and those that were still in pots waiting to be planted.

With all of the leaves now fallen away from our fruit trees we needed to paint the tree trunks white. We did this for those that were already planted and those that were still in pots waiting to be planted.
Yesterday morning Jon, Sarah, and I went to the Century Farm Orchards Open House in Reidsville, NC. Their open house is every Saturday in November and February each year. This is a priceless and lovely family ran orchard that specializes in heritage varieties of apple trees. We signed the guest register when we first arrived. There were visitors from Georgia and South Carolina. We had no idea this was such a big deal. There were quite a few people there.
There were over 100 varieties of apples on display. We had heard of very few of them. We were able to taste test many varieties and sampled their apple cider. Over the course of the time we were there, I believe Sarah may have drank her weight in apple cider. We were taking notes on the varieties we liked. Bill even mentioned making “good” cider requires crab apples. We were immediately intrigued. We have an ornamental crab apple tree that we made jelly from. It was tasty, but those tiny crab apples were a test for the ole patience. He showed us a few varieties of crab apples that were golf ball size. We honestly did not know crab apples could be so big! I guess what we were used to seeing is the various ornamental crab apples. When we asked Bill for some suggested crab apple varieties for cider he deferred us to Anne who was nearby giving instruction on all things apple. We learned a lot of information on the history of certain apple varieties.
Continue reading “Visit to Century Farm Orchards and More Apple Trees!”
As we continue to add things we want to grow, and wanting more of the things we already grow in our garden, space is becoming a big issue. We fenced off a corner of the back yard for our garden to keep the chickens and the dog from digging up our produce and now we have filled up that little space with our annual crops and find that we need more space.
Last year, we almost tripled the size or our garden. We installed permanent fencing around our garden area because we have a line of pine trees that prevent us from expanding the current garden area any farther. Expanding the fenced in area, as we did last year when we went from a temporary movable fence to our current permanent fence, is no longer an option.
We decided that the next step in adding some more garden space was to install a couple of beds for our tomatoes and peppers. This would be a simple and easy addition to our gardening area.
First, we cut down a couple small but tall and straight pine trees from our land in an area that we are needing to clear any way.
 |
| Nice and straight logs for the edge of our beds. |

Last year, we received some winter onion bulbets from Ann’s Mama. We planted all 16 bulbets in November of last year. 15 of them sprouted and grew all year long. That’s not a bad germination rate.
 |
| Winter onion bulbets growing from the top of the onion stalk. |
Saturday we went out to the land to try get some work down. We have so many plans for it, but honestly time, money, and circumstances have made things move slower than we had hoped. I won’t go into the specifics, but the big hold up is that we are currently waiting to clear off a section of the land so that we can prepare it to plant fruit trees. We hope to have a full orchard and some grape vines by the time we move out there. Thus, they are one of our first priorities because of the time it takes them to mature.
While we are unable to plant our orchard at this time, we did plant 5 apple trees this past spring along the driveway entrance. To our dismay they were quite the tasty treat for the deer and the trees were very damaged. We were heart broken, but they were still alive.
Continue reading “Caging the Apple Trees for Deer Protection”
You would think that now it is fall things may be slowing down around here and I would have a little bit of time for blogging. But it seems my paying job, church, and Sarah’s ever busy calendar has kept me on the go. I must admit I am looking forward to slowing down a bit and trying to get back to a little crocheting. But I cannot seem to be still long enough for that or when I do have a moment, I’m just so darn tired and brain dead.
Sunday afternoon I had a couple of hours to myself. I walked around and took inventory of how everything was looking around our place. I honestly have not done much of that lately. Jon has been doing most of the lingering garden tasks as things were still growing and coming in. I decided to take a few photos as I did my walk about.
 |
| The Crabapple Tree is Loaded Down |
| Continue reading “Fall Around Our Place” |

Back in February we planted 2 Latham and 2 Heritage Everbearing bare root raspberry canes. We were pleasantly surprised when they began growing and did not die like our attempt last year. But what was even more amazing to us is that the 2 Heritage Everbearing canes were putting out fruit! A few weeks ago we were doing our evening walk in the garden and out of the corner of my eye I saw bright red over at the raspberries.
Knowing the proper time to harvest veggies from the garden can be difficult. Luckily, with onions there is no guess work. You can harvest onions throughout the season to use as you need them, or you can leave them in the ground to get bigger bulbs. Once the tops of the onions fall over and dry out, the onion bulb will stop growing.
Harvesting the onions can be as simple as grasping the stalk and pulling. The bulb should pop right out of the ground. If you have a stubborn onion, you can simply stab a small hand spade under the onion and pop it out, just be careful to not hit the onion.
Once the onions are harvested, they need cured prior to storage. It is best to harvest the onions on a warm sunny day, so you can let your onions begin to cure in the sun for a day or two. After that, or if the weather is not cooperating, they need to be placed in a shady location with good airflow. Good airflow is very important so make sure they are spread out and not stack on top of each other. We used a short, wide crate with lots of air holes. You can lay them out on a table, or even braid the stalks of several onions together and hang them to cure.
 |
|
| Onions curing in our crate. |
After curing for two to three weeks, the roots and any stalk remaining should be dry and brown. Also the skin of the onion should be very dry like paper. After this onions can be stored in a cool dry place. Onions properly cured can be stored for up to six months.
Our First Winter Onions
4 Month Update
5 Month Update (Comparison to Annual Onion Sets)
6 Month Update
Harvesting and Curing Onions
One Year Update
No, it’s NOT the Great Pumpkin, Charlie Brown! However, we did officially have a “pumpkin harvest”….barely.
Last year we only planted mini pumpkins. They started out great, but the stink bugs destroyed them literally over night. This year we had higher hopes. Cornfield Pumpkin and Connecticut Field Pumpkin seeds is what we planted this year. As par for the course, we do not remember which we planted where. So, as they grew we did not know what we had. Does anyone else do these kinds of things?!?
Continue reading “It’s NOT the Great Pumpkin, Charlie Brown!”
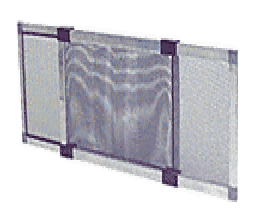
Not long ago, my better half decided that we needed a drying rack when she was inspired by Magnolia Holler’s Herb Drying Rack. It would come in handy for drying our garlic and our winter bulblets. Being frugal (read: cheap) we settled on a rather inexpensive design.
We started with an adjustable window screen.
 |
| Photo Credit Google |