This DIY FIFO can rack can save valuable shelf space. It only uses up 2 square feet of floor space and holds up to 120 cans. The concept is simple. You place the new can on the top shelf. The can rolls back, falls to the lower shelf and rolls forward. This way your cans always stay rotated without having to take them all out and place the new ones under or behind the old ones.
Category: DIY
New Pepper and Tomato Beds
As we continue to add things we want to grow, and wanting more of the things we already grow in our garden, space is becoming a big issue. We fenced off a corner of the back yard for our garden to keep the chickens and the dog from digging up our produce and now we have filled up that little space with our annual crops and find that we need more space.
Last year, we almost tripled the size or our garden. We installed permanent fencing around our garden area because we have a line of pine trees that prevent us from expanding the current garden area any farther. Expanding the fenced in area, as we did last year when we went from a temporary movable fence to our current permanent fence, is no longer an option.
We decided that the next step in adding some more garden space was to install a couple of beds for our tomatoes and peppers. This would be a simple and easy addition to our gardening area.
First, we cut down a couple small but tall and straight pine trees from our land in an area that we are needing to clear any way.
 |
| Nice and straight logs for the edge of our beds. |
Caging the Apple Trees for Deer Protection
Saturday we went out to the land to try get some work down. We have so many plans for it, but honestly time, money, and circumstances have made things move slower than we had hoped. I won’t go into the specifics, but the big hold up is that we are currently waiting to clear off a section of the land so that we can prepare it to plant fruit trees. We hope to have a full orchard and some grape vines by the time we move out there. Thus, they are one of our first priorities because of the time it takes them to mature.
While we are unable to plant our orchard at this time, we did plant 5 apple trees this past spring along the driveway entrance. To our dismay they were quite the tasty treat for the deer and the trees were very damaged. We were heart broken, but they were still alive.
Continue reading “Caging the Apple Trees for Deer Protection”
DIY: Inexpensive Easy Drying Rack
Not long ago, my better half decided that we needed a drying rack when she was inspired by Magnolia Holler’s Herb Drying Rack. It would come in handy for drying our garlic and our winter bulblets. Being frugal (read: cheap) we settled on a rather inexpensive design.
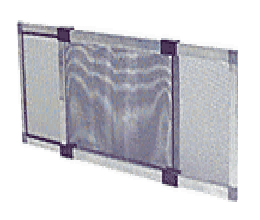
We started with an adjustable window screen.
 |
| Photo Credit Google |
DIY: Bathroom Redo and Painting Tip
All of our main bathroom fixtures were a horrible powder blue. Yes, that’s right powder blue! I have hated it from day one for the last 14 years. Let me tell you, all blue toilet, sink, and tub really limit your painting and decor options. And now due to about 25 years of age they were really wearing out. Much of the glaze had worn off from the inside of the tub making it ugly and dull and hard to clean stains. The walls of the shower were tile and had been repaired multiple times and really just needed to be completely removed or redone. Every time I cleaned the sink and counter little blue chips of the sink was starting to flake off.
So finally, over the course of the last couple of months we have been gradually redoing our bathroom. Jon replaced the toilet and sink/cabinet a couple of months ago. Jon started with the toilet as it was just the easiest part of the process. Then a few days later, the sink was a particular challenge as the nook it sets in is not any standard size and we refused to pay custom cabinet and counter top prices. But with some special cutting into the sheet rock and 2 sink/counter tops later it was in and looked good. Tip: If the counter top is a tight fit, the bubble in the level says it isn’t quite level, and it is still slightly wedged between two walls do NOT sit on it and bounce to coax it the rest of the way down. If you bought the cheap affordable cabinet with the cheap thin counter/sink it may spider into a million pieces. We can laugh about this now, but were not laughing at the time.
DIY Wallflower Scented Plugin Refills
Many weeks ago I came across a pin on Pinterest for DIY Wallflower Scented Plugin Refills. As with other nifty pins that I find I pinned it with plans of trying it myself eventually. I currently use a few Wallflower Scented Plugins in our home. I love them, but the refills are quite expensive. I always try to buy 5 or more to get them at a better price.
Building The Chicken Run
After building the chicken coop for our new chicks, we turned our attention to the chicken run. We wanted to give our chickens as much room to roam in complete safety as possible without spending a lot of money. They will get to free range in the backyard as much as possible, but we needed an area where they could be safe while we were away at work and still get out of the coop.
We wanted it to be completely enclosed and since chicken wire came in a 50′ roll, we decided on a 6′ x 10′ area. The coop would take up 3′ of one side so these dimensions required 49′ of chicken wire.
I began by digging a 6″ deep trench where the fence would go and 10″ deep holes for the posts. The chicken wire would be buried 6″ deep to stop digging predators from entering under the fence.
Next I built the back side of the fence. 3 posts with a top rail and a bottom rail that would sit on the ground. We attached the chicken wire to the fence with a staple gun and dropped the posts into the holes. This way we could bury the posts and the chicken wire at the same time. Do not be stingy with the staples. As we found out in our recent chicken disaster you do not want to have an area that is not securely attached. After that incident I went back and put a staple in every other ring on the chicken wire all the way around the run.
Building the Chicken Coop
The basic design for our chicken coop was a 3’x4′ square. 3′ tall with a simple slanted roof. It is to house chickens so it is not necessary to go overboard, and I am very proud of myself as I usually go overboard.
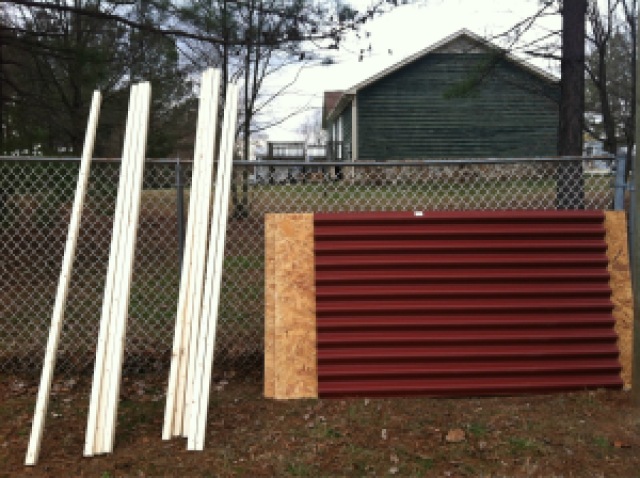
Lowe’s had 2×3’s on sale. 2×4’s are the usual material for wall studs and floor joists but let’s face it, chickens don’t weigh that much. With the price of lumber (as well as everything else) these days, any savings was appreciated. I decided to use 1/4″ OSB instead of plywood due to the price difference. The moral here is, while we love our chickens, they are still just chickens and don’t need a “William Sonoma” mansion.
 |
| Chicken Coop Materials from Lowe’s |
Simple Door Reinforcement
Here is a very simple, and cheap home security improvement that anyone can do in just a few minutes.
The plates in your door right now probably have 3/4″ or 1″ screws holding them in place. All this accomplishes is holding the plate in place. If you remove those screws and replace them with longer screws, it will add a little more resistance should an intruder even try to kick your door in.
Using 2″ or 2 1/2″ screws will secure the, plate in place as well as go through the door frame and into the stud next to the frame. This will make your door more sound.
Now, I am not suggesting this will stop an intruder, because it won’t. However, with 2 screws through the door knob plate, and 2 more through the dead bolt plate, it just may add enough resistance to force an intruder to fail to breach your door on the first try, or cause them to loose their balance due to the additional force. This could buy you some precious time. Enough time to get your wits about you, or give you a jump on preparing to defend your home and family.
There is no guarantee that any of this will help. However, there is a chance it will slow an intruder down just enough to change the outcome in you favor. For the few cents 4 screws cost, why not? Even if you think the odds of this helping are as low a 1%. Wouldn’t you buy that extra 1% for under a buck?
Garden Fence/Grapevine Trellis
Being on only one acre of land, we are always looking for ways to maximize the usage of our space. As we were needing a new fence around our expanded garden, we had a revelation that we could also use this as a trellis for our grapevines.
During the first year of our garden, we needed a fence to keep our family dog from digging up our plants. She is wonderful dog. A little hyper and friendly as can be, but she loves to dig.
We made a trip to Lowe’s. Luckily its only a 10 minute drive since we seem to go there quite a lot. We had the measurements of our garden but were unsure of just what type of fencing we were going to use. After much discussion we settled on rabbit wire. Smaller holes on the bottom to keep out small critters and it also happened to be the cheapest. We purchased some of the little green metal posts to support the fence.
The idea of this fence worked perfectly. It went up fast, kept the dog out, and was easily moved when we expanded our garden for this coming season.
 |
|
| The Arbor with the first year grapevines. |


