The upstairs of our 1940’s farmhouse has not seen many (if any) updates to it. The upstairs has three small bedrooms. Two bedrooms are rectangular and have closets that are built into the attic space. The third bedroom in the middle has no attic space to utilize for closets and is square. We only have our youngest who is 14 that still lives with us. We let her choose which bedroom she wanted. Not surprising, she chose one of the rectangular bedrooms that had a closet and had the best window view overlooking one of the hay fields. The bedrooms are a little small. Adding to the challenge, she currently has an excessively large bedroom at our current house. To compensate for the space, her bedroom will be the one she chose and the square middle room with no closets will be a game room. Today, we will discuss the updates to the bedroom so that it functions well and suits a 14 year old teenage girl.
As a teenage girl she does not currently share our affinity for old things. To her, they are just old. Thus, her room is less country farmhouse and more hip looking (it probably is not hip to use the word hip). Teal is her favorite color. No doubt, I knew she would choose some shade of teal. She agonized at Lowe’s over several teals and turquoise shades and settled on Valspar Signature semi-gloss “La Fonda Turquoise”. I had hoped and tried to convince her into a lighter shade, but her mind was set. It is a pretty color, but I was worried about having such a dark color in a small space.
The walls, trim, ceiling, and doors were varying shades of dingy off-white. Jon spackled and repaired before painting. As this was her room, Sarah helped with the painting. This was really the first time she had painted and she did a great job. It is not all perfect, but that is OK. As in the other rooms, we painted the trim and ceiling with a slight off-white Valspar Signature semi-gloss. This ceiling is plaster and even with spackling just isn’t perfect. I tend to gravitate toward semi-gloss rather than flat because it just cleans so much easier and I normally like the finish better. However, we probably should have gone with a flat rather than a semi-gloss on the ceiling as I believe it would “hide” the imperfections in the surface better. But it didn’t look bad enough for us to paint it again. I found the angled design of the ceiling and how it meets the walls with no molding more challenging to paint than in a room where there is a 90 degree angle and molding. As horrible as I am at taping I did decide to tape this line so it would not be a little wavy line all the way across, because my hand just is not that steady. The paint did peel in one spot when I removed the tape, so we had to touch that up later. Because we were painting with such a dark turquoise over a light color, it took three coats and even more touch-ups so that we didn’t see the original white walls showing through. The dark color trimmed with the off-white really pops, but it is not forgiving at all of any mistake. Every little mishap jumps out at you all the way across the room. Thus, I spent lots of time touching and retouching this room.
This room has a low ceiling and just had a light bulb with a pull chain. I really wanted a ceiling fan in the room, but Jon was concerned about the ceiling being too low. We all 3 eventually agreed on an aged bronze ceiling fan that almost looks black and sets flush with the ceiling and the separate matching low profile light fixture. Sarah and I have no issue walking under it, but Jon who is much taller is cutting it quite close. Since there was no light switch on the wall near the door, Jon also installed the fan with a handheld ceiling fan remote. These remotes come in various styles and options, but we went with a basic remote that can simply turn the lights and fan off and on. The remote comes with a wall mount that Jon mounted on the wall near the door at a typical convenient light switch location. This works nicely and is so much easier than trying to pull wires through the ceiling (across studs in the opposite direction) to a light switch across the room. Then there is the added convenience of a remote that can be taken to the nightstand at bedtime.
She got a new Roku smart TV for Christmas that we got on a Black Friday deal that will go over the chest of drawers. It has built-in WI-FI, Netflix, and the Time Warner Cable apps that she can use without having to run any coax upstairs. If you have ever tried to update the wiring in and old house or run coax upstairs you understand just how awesome going wireless is.
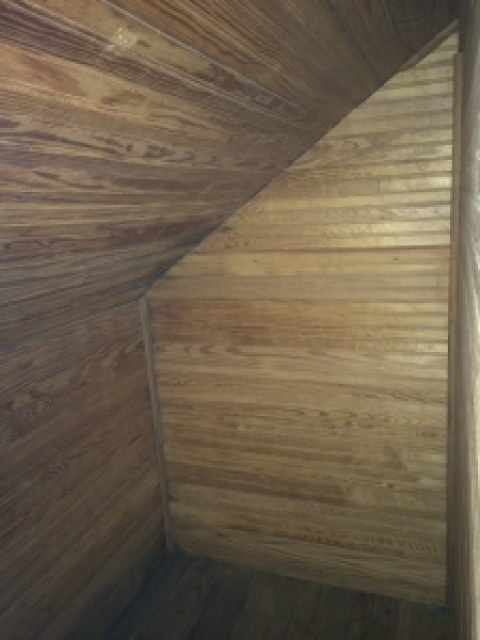
Surprisingly, this room did actually have one 2 prong outlet. However, we wanted a second outlet on the opposite wall near the chest of drawers so that she can plug in her TV. Even with wireless, there needs to be wires for electricity. Jon pulled wires from the ceiling light before installing the ceiling fan through the ceiling down into the closet. There he added a pull chain light inside the closet near the closet door. From the new light he then ran the wire for a new outlet in her bedroom and also an extra outlet in the “soon to be” game room. All I did was assist when needed and stay out of the way when not needed. Getting that wire pulled through the ceiling to the closet was the most challenging and frustrating. Jon also had to take several of the tongue and groove beaded boards off of the closet walls to be able to access everything. He worked very hard to add modern day functionality to Sarah’s space. We’ll probably do a separate post just on the closet redo once it is finished.
 |
| Attic Closet with Tongue and Groove Beaded Board |
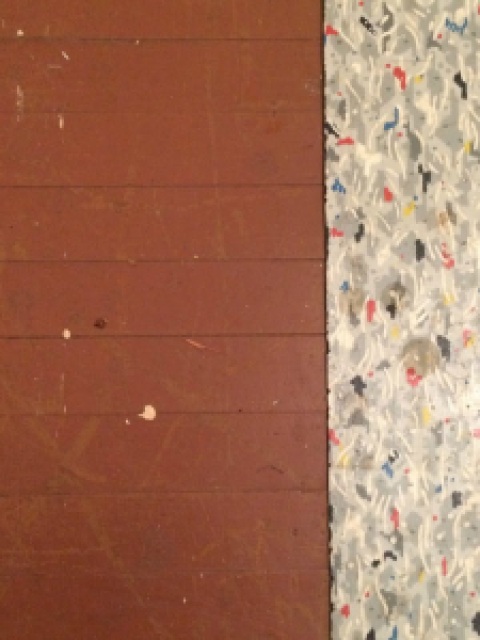
The room has wood floors that have several coats of paint on them. Some day I’d like to strip and refinish the wood floors.
 |
| Painted Hardwood Floors |
But that is just more of a project that we cannot take on right now. So, I found an 8×10 turquoise area rug with a cool modern print that really went great with the color of the room, the dark ceiling fan, and the chest of drawers. When we first rolled it out we had to let it lay for several days for it to lay nice and flat. We used several rails of old bed frames (that we have an over abundance of) to help weigh it down until it flattened completely. The area rug ties it all together so nicely.
And lastly, Sarah’s room at our current house has dresser drawers built into the attic space of the walls so she did not have a dresser or chest of drawers. She did have a nightstand and other furniture that I wanted to match. I found this South Shore black 5-drawer chest that coordinated well. Although some of her current furniture will go in the game room, all of her current furniture is black. Even the handles on the drawers were a close match to her current pieces. Due to the small size of the room, it was also important to find a piece that utilized more vertical than horizontal space. I found this tall 5-drawer versus many 4-drawer styles to be perfect.
Thus far, this room was the most challenging in several ways, but I believe we have successfully transformed it into a fitting space for a teenage girl.
Our 1940 Farmhouse Series:
Our 1940 Farmhouse
Our 1940 Farmhouse – Upstairs Bedroom Makeover
Our 1940 Farmhouse – Upstairs Guest Bedroom Makeover
